Introduction
If you’re craving a crunchy, savory snack that combines juicy meat and vibrant veggies wrapped in a golden shell — these homemade crispy beef spring rolls are just what you need. Whether as a party appetizer, a cozy dinner side, or a satisfying snack, they deliver a delightful contrast of textures and flavors: crunchy exterior, tender meaty filling, and aromatic vegetables inside. Easy enough for a weeknight treat, but impressive enough to serve guests.
Ingredients
Here’s what you’ll need for roughly 20 spring rolls (adjust as needed):
For the filling
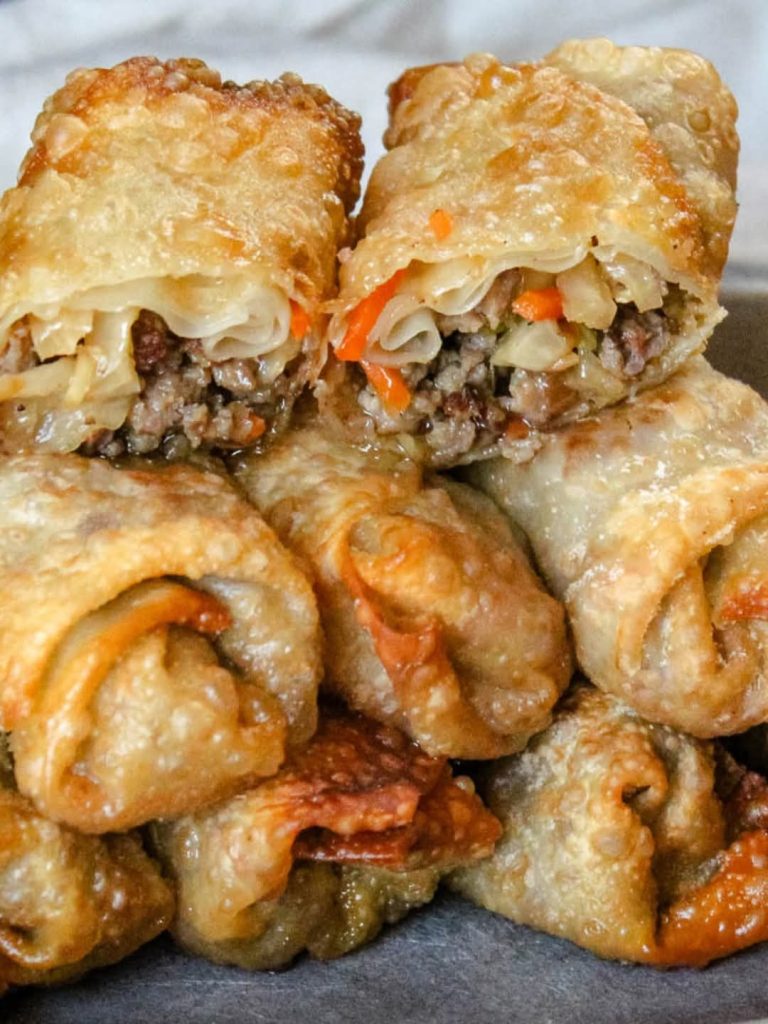
- 1 lb (≈450 g) ground beef
- 1 cup shredded cabbage
- 1 cup grated carrot
- 2–3 cloves garlic, minced
- 1 teaspoon grated fresh ginger (optional but adds warm aroma)
- 2 tablespoons soy sauce
- 1 tablespoon sesame oil (optional, for deeper flavor)
- Salt and pepper to taste
For wrapping & frying
- 20–25 spring roll wrappers (thawed if frozen)
- 1 egg, lightly beaten (for sealing; or flour-and-water slurry)
- Vegetable oil — enough for deep frying (about 2–3 inches / 5–7 cm depth)
Preparation Steps
1. Prepare the filling
- Heat a tablespoon of vegetable oil in a skillet over medium-high heat. Add the minced garlic (and ginger if using), and sauté until fragrant.
- Add the ground beef, breaking it apart and cooking until fully browned — about 5–6 minutes.
- Season with soy sauce, sesame oil (if using), salt, and pepper. Stir well to combine.
- Add shredded cabbage and grated carrot to the beef mixture. Cook for another 2–3 minutes, until vegetables are slightly softened but still retain a bit of crunch.
- Remove from heat and transfer filling to a bowl. Let it cool slightly — this makes wrapping easier and prevents the wrappers from tearing.
2. Assemble the spring rolls
- Lay a spring roll wrapper on a clean work surface, with one corner pointing toward you (diamond shape). Keep remaining wrappers covered with a damp cloth to prevent drying.
- Spoon about 2 tablespoons of filling onto the lower third of the wrapper.
- Fold the bottom corner up over the filling, then fold the left and right corners toward the center. Roll the wrapper tightly upward, sealing the top corner with beaten egg (or slurry) to hold it closed.
- Repeat until all filling and wrappers are used.
3. Fry to golden crispiness
- Pour vegetable oil into a deep pan or pot to reach around 2–3 inches (5–7 cm) deep. Heat to about 350 °F (≈ 175 °C).
- Carefully place a few spring rolls at a time into the hot oil — don’t overcrowd. Fry for about 3–4 minutes on each side (approximately 6–8 min total) until wrappers turn golden brown and crispy.
- Use a slotted spoon to remove the rolls and place them on paper towels to drain excess oil.
Alternative (healthier) cooking methods:
- Baking: Brush rolls lightly with oil, place on parchment-lined baking sheet, bake at 400 °F (≈200 °C) for ~15–20 min, flipping halfway.
- Air-frying: Preheat air fryer to around 380–400 °F (≈190–200 °C), spray rolls with oil, air-fry until golden and crispy (time depends on model & amount).
Serving Suggestions
- Serve hot for maximum crunch.
- Pair with dipping sauces such as sweet chili sauce, hoisin sauce, soy-garlic-ginger sauce, or peanut sauce for added depth.
- For a full meal: serve alongside steamed jasmine rice, stir-fried vegetables, or a fresh cucumber salad for balance.
Discussion Questions (Great for Comments / Engagement)
- What variation of vegetables or spices would you try in these spring rolls?
- Would you prefer baking or deep-frying — which gives the best balance between health and taste?
- What’s your favorite dipping sauce to pair with crispy spring rolls? Sweet, savory, or spicy?
- Have you tried using other proteins (e.g. chicken, shrimp, tofu) instead of beef? How did it compare?
Important Notes & Tips for Success
- Use fresh, good-quality wrappers; older/dried-out wrappers tear easily.
- Keep unused wrappers covered with a damp cloth to prevent drying while you assemble.
- Make sure the filling is reasonably dry before wrapping — moisture causes soggy rolls. Drain excess liquid if needed.
- Fry in small batches to maintain oil temperature — dropping too many rolls at once lowers temperature, yielding greasy, soft rolls instead of crispy.
- Always let the rolls cool briefly after frying — filling continues cooking slightly, and they crisp up further.
Frequently Asked Questions (FAQ)
Q: Can I freeze these spring rolls before frying?
A: Yes. Assemble the rolls, freeze them on a tray so they don’t touch, then transfer to an airtight container. You can fry them directly from frozen — add a minute or two extra cooking time.
Q: Can I make them ahead of time for a party?
A: Absolutely. Prepare filling ahead (keep refrigerated up to 1–2 days), then wrap and fry just before serving to preserve maximum crispiness.
Q: Are spring-roll wrappers the same as egg-roll wrappers?
A: Not exactly. Spring-roll wrappers are thinner and crispier; egg-roll wrappers are thicker and chewier. Using spring-roll wrappers yields lighter, more delicate rolls.
Q: I don’t eat beef — can I substitute another filling?
A: Yes. Ground chicken, pork, shrimp, or even crumbled tofu work well. Vegetables can be adjusted too (e.g. mushrooms, bell pepper, bean sprouts), depending on your preference.
Enjoy crafting these golden, crunchy spring rolls — a comforting, crowd-pleasing dish that’s sure to impress whether at family dinner or a gathering with friends!